With Effect from Mid-September 2022, Instagram is no longer supported on Photonic. The issue is with Meta now requiring that every app go through a Business Verification on Meta. As a hobbyist, I don’t run a Photonic as a part of a business, so Meta essentially killed the plugin. If you run a business and would like to make use of the code, feel free to do so – the code is still in place, and is distributed under GPL v3. The contents of this page are retained for archival.
Photonic lets you display your photos from Instagram on your self-hosted WordPress site. Instagram galleries can be built out using the following methods:
- If you are using Photonic in the shortcode mode, the switch to show Instagram photos is the
type='instagram'parameter. - If you are using Photonic in the Gutenberg block mode, to build a gallery pick the Instagram option in the Photonic block.
Users will first need to authenticate, then follow use one of the available methods to create galleries.
Unlike other galleries the default layout for Instagram is the “Justified Grid” layout. This is because with its new Graph API Instagram has eliminated the option to retrieve multiple image sizes and only provides the original, large image.
Gallery Usage
Displaying All Your Photos (🔗)
In its simplest form, all you require is the type parameter, and the most recent photos for that user are shown:
[gallery type='instagram']This equates to the following selections in the Gallery Builder Wizard:
- Choose Gallery Source: Instagram
- Choose Type of Gallery: Multiple Photos
Carousel Handling
While viewing “Multiple Photos”, Photonic will automatically recurse through any carousel (a.k.a. post with multiple photos) and show all photos of the carousel. You can prevent this by setting the parameter carousel_handling to single, which will show just one photo from the carousel.
Displaying a Single Photo(🔗)
In continuation of the previous example, if you wish to run something along the lines of a “Photo of the Day” campaign, you can display a specific photo. This will show a photo, complete with attribution and the number of likes / comments for that photo. For this you can use the media_id parameter, to which you pass the shortcode or the id for a photo. To find the shortcode of a photo, look at the last portion of a photo’s page, e.g. https://www.instagram.com/p/BOyLANGBC3Z/. The highlighted portion is your shortcode:
[gallery type='instagram' media_id='BOyLANGBC3Z' embed_type='embed']This equates to the following selections in the Gallery Builder Wizard:
- Choose Gallery Source: Instagram
- Choose Type of Gallery: Single Photo
Note:
- The Gallery Builder Wizard will not populate the URL shortcode (i.e.
BOyLANGBC3Z), rather it will use the Instagram id (i.e.17857649401127309) for your media. - The
embed_typeattribute says how the photo should be shown. It takes two values:embed– The photo shows up as an “Instagram embed”. This is the default behaviour, and if you are using an id like the URL shortcode (i.e.BOyLANGBC3Z), regardless of theembed_typeyou will always get an “Instagram embed”.integrate– The photo shows up like a regular photo on your site would, without an “Instagram embed”
[gallery type='instagram' media_id='17857649401127309' embed_type='integrate']If the media_id refers to a carousel (also known as a post), Photonic will embed all photos of the carousel in it if embed_type='embed'. If embed_type='integrate' this will only show the first photo from the carousel:
[gallery type='instagram' media_id='17870919646618915' embed_type='integrate']All Photos in a Carousel (a.k.a. post) (🔗)
All photos from a post (i.e. a carousel album) can be displayed by using the carousel parameter, where the id for the carousel can be passed. This feature requires you to use the gallery builder to fetch the carousel ids, as there is no other way to get the same (the Instagram URL cannot be used).
[gallery type='instagram' carousel='17870919646618915']This equates to the following selections in the Gallery Builder Wizard:
- Choose Gallery Source: Instagram
- Choose Type of Gallery: Photos in a Post
Videos (🔗)
What if you had some videos in the mix? Photonic can handle that too. I have the philosophy that Photonic is meant for photos, not videos, because Photonic’s primary goal is to assist in making photos easily and beautifully presented for photographers using WordPress. In fact most online photo services deprioritize videos with the same philosophy, and some services don’t even have videos! At the time of writing 500px.com doesn’t have videos, and guess what? Native WordPress galleries don’t support videos! That being said, people often use photo services, notably Instagram to share personal videos, and so, with effect from version 1.66 of Photonic, videos are supported.
Videos are turned off by default for each provider. For Instagram the setting is under Photonic → Settings → Instagram → Instagram Settings → Media to show. Regardless of this setting, you can explicitly pass the media parameter to your shortcode. This parameter takes values photos (to show photos only), videos (to show videos only) and all (to show both photos and videos). I have videos turned off on my website, so I will use the media parameter to show videos from my account:
[gallery type='instagram' media='all' count=10 more='Load More']Note that lightboxes have notoriously flaky support for externally hosted videos. Please refer to the lightboxes page to see which ones can be used.
Videos can be incorporated into any layout.
Deferred Loading, a.k.a. “Show Gallery” (🔗)
In the examples above you see a button that says Show Gallery. This is a feature that ensures that Photonic doesn’t make the call to your photo source when your page is first loaded. It instead defers the call to your photo source until it the button is explicitly clicked by your end user. Using this button ensures that your page loads quickly the first time.
This button is created by adding the shortcode attribute show_gallery="Click to see gallery". You can replace “Click to see gallery” with the text of your choice.
Authentication and Setup (🔗)
To use Photonic for Instagram you will first have to login to Instagram and grant Photonic the permission to use an “Access Token”. This is the process of setting up the plugin to work with Instagram:
- Install the plugin and activate it.
- Go to the page Photonic → Authentication in your admin dashboard.
- Look for the button to login and get the access token:
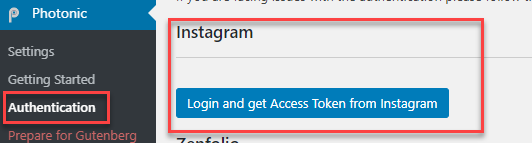
- When you click on it, you will be taken to an Instagram authorization page (this is hosted on Instagram):
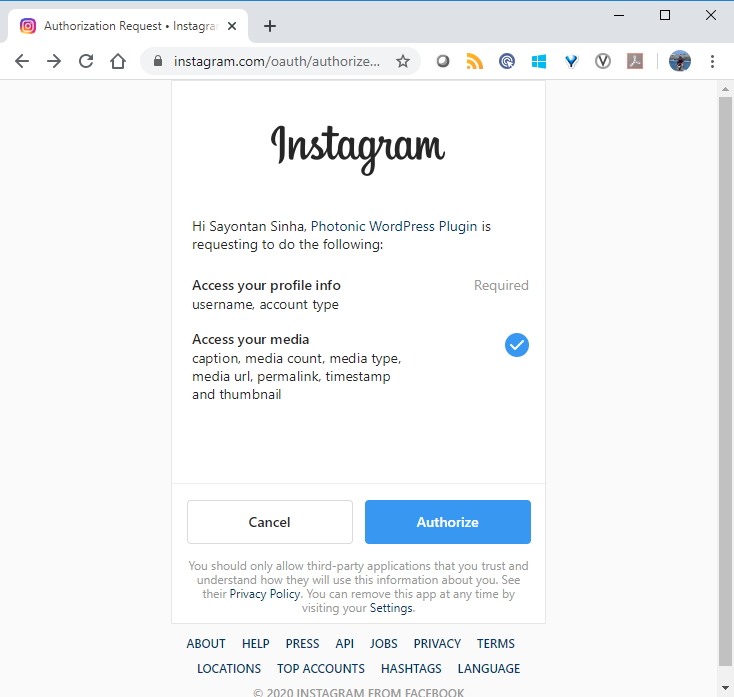
- Once you “Authorize”, you will be taken back to a page to retrieve your tokens:
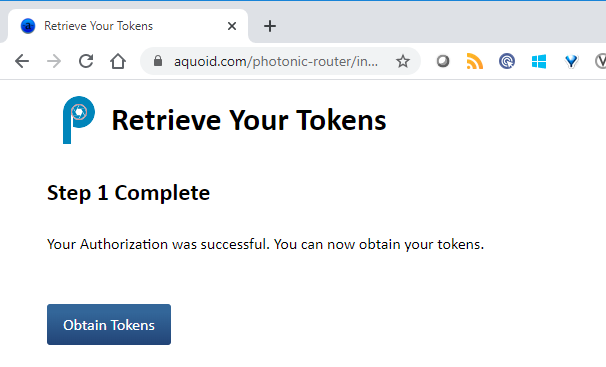
- Obtain a “short-lived token”…
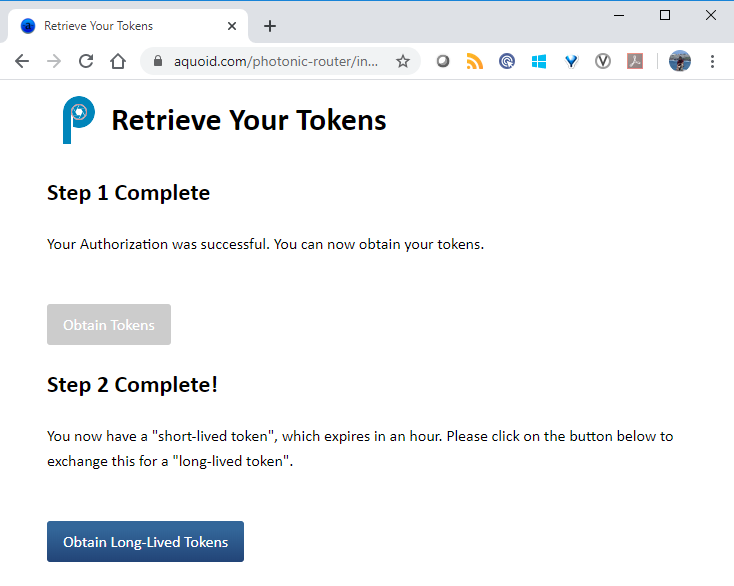
- … Using which you will obtain a long-lived token. This will show you your user name for additional confirmation:
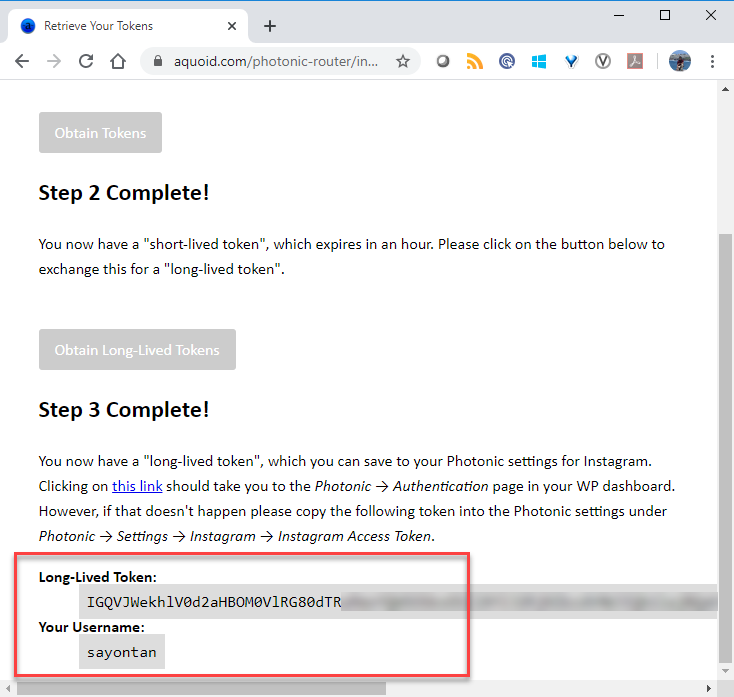
- Click where it says “Clicking on this link” in the above, to be taken back to your WP dashboard. The token and the user name should be populated there:
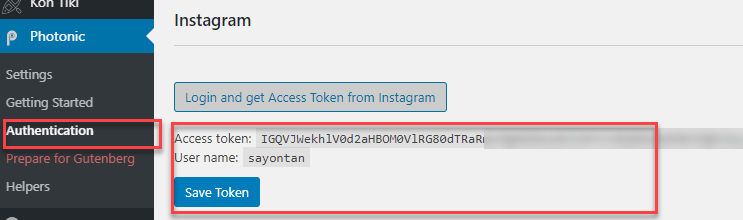
- Click on “Save Token”, and you are done!
That’s it! You are good to go.
Privacy Policy (🔗)
Photonic is a WordPress plugin providing registered users of Instagram an ability to display their own Instagram photos on their WordPress websites.
This Privacy Policy describes how and when Photonic collects, uses and shares your information when you use the plugin. Your installation of Photonic receives your information through Instagram APIs. The following are the types of information stored by Photonic for different people:
- For a person installing and using Photonic: The only information stored is the Instagram user id of that person, the Instagram Access Token, and when the token expires. This information is required by Photonic to fetch and display the photos on that person’s website. Photos and other details are not stored by Photonic. When you uninstall (not deactivate) Photonic through the WP dashboard the stored information is removed.
- For a person visiting a website using Photonic: No information is stored.
- For the person building Photonic: No information about who is using Photonic and for what purpose is sent back or stored.
Apart from token-specific information, all other information is transient and not stored by the plugin, either in your installation or elsewhere.
The access token retrieved by Photonic only has permissions to read basic profile information and view content shared publicly. It does not follow, post, like or comment on any content on your behalf. This access token is unique to you, and does not leave your own WordPress installation.
Photonic neither collects internally, nor phones back, nor shares your information with any third-party. Ever.