Contents (🔗)
- Overview
- Steps to Make Google Photos Work
- Obtaining a Client ID
- Authentication
- Authentication Workaround
- Other Common Issues
Overview (🔗)
Using Photonic with simple parameters the gallery short-code / block can now be used to display albums and photos from Google Photos:
The main switch for Google Photos is the type parameter. You also need to have a view specified as well:
[gallery type='google' view='abc'] You can also control various skinning aspects of how the thumbnails are displayed. Feel free to look at the Photos and Albums pages for examples on usage.
Steps to Make Google Photos Work (🔗)
Google’s setup is a LOT, LOT harder than any other platform’s, and is not for the faint of heart! I have tried to be very thorough in the documentation below, but Google changes things often and without notification. If you find that some steps are missing or inaccurate, please let me know.
The following high-level steps are required to get Google Photos working on your site:
- Obtain a Client ID
In an ideal world this wouldn’t be required. However, Google enforces a 10,000 call cap on Google Photos API calls associated with each API key. Given Photonic’s popularity it is conceivable that more than 500 people use Photonic for Google Photos alone. If each person’s pages get visited around 20 times each day, across all users Photonic will quickly hit the daily cap of 10,000 requests. This makes it impractical for me to bundle my client id in the plugin, as people will start seeing errors on pages once the cap is hit.Nebulous though this is, you can get a client id using the following steps:
- Authenticate
This is a must for Google Photos as unauthenticated calls are not supported- In most cases you will be able to authenticate as per the documentation.
- However, there are documented instances of server configurations and plugin conflicts that prevent the authentication bundled with Photonic from working. In such cases try the workaround.
- Start creating your galleries
Obtaining a Client ID(🔗)
Unlike other platforms, getting a client ID for Google is really long process! I have tried to be very thorough in the documentation below, but Google changes things often and without notification. If you find that some steps are missing or inaccurate, please let me know.
Creating a Google Project (🔗)
The first step involves setting up a Google API Project. If you do not have a Google API project set up in the API Manager, follow these steps:
- When you log into the API Manager, your screen should look similar to this:
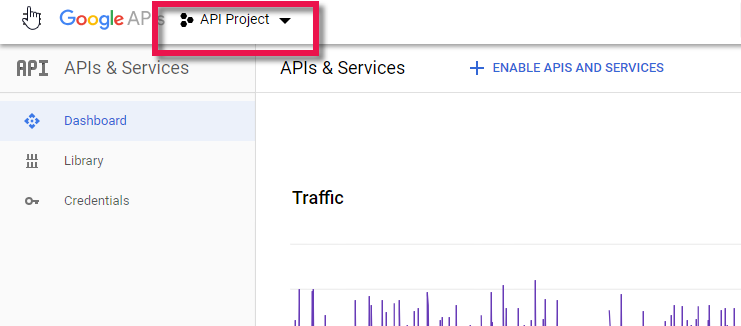
Do you have a dropdown for projects at the top?
If you already have a listing of projects at the top, proceed to create a client ID. If not, read on. - Start off by clicking on the project selection link:
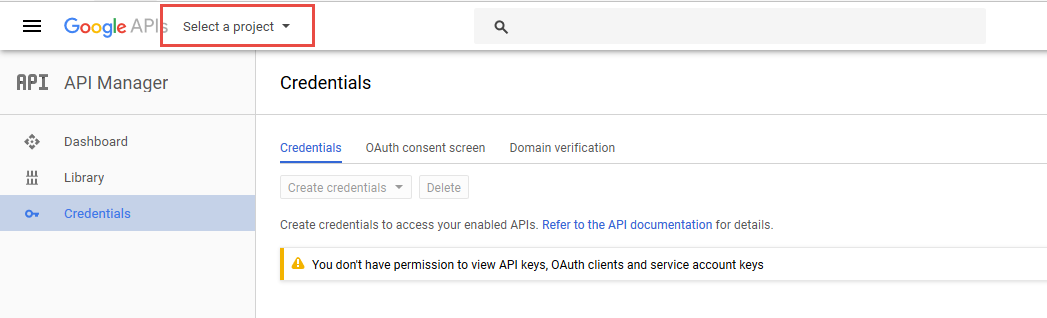
Click on the project selection link - Now, click on the “+” icon:
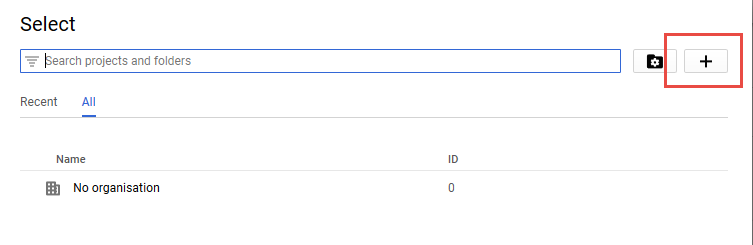
Add a project - On the resultant screen fill out a project name and click “Create”
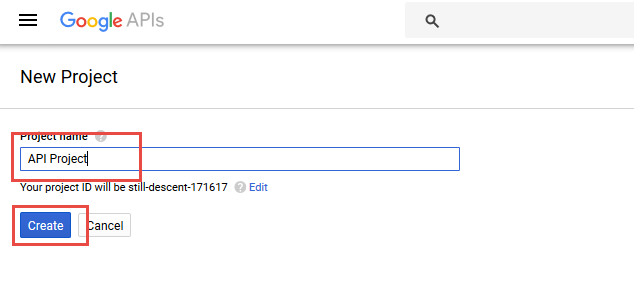
Create the project
That’s it. Your project will now appear in the project selection dropdown.
Creating a Client ID (🔗)
The Client ID is mandatory for Google. To get one:
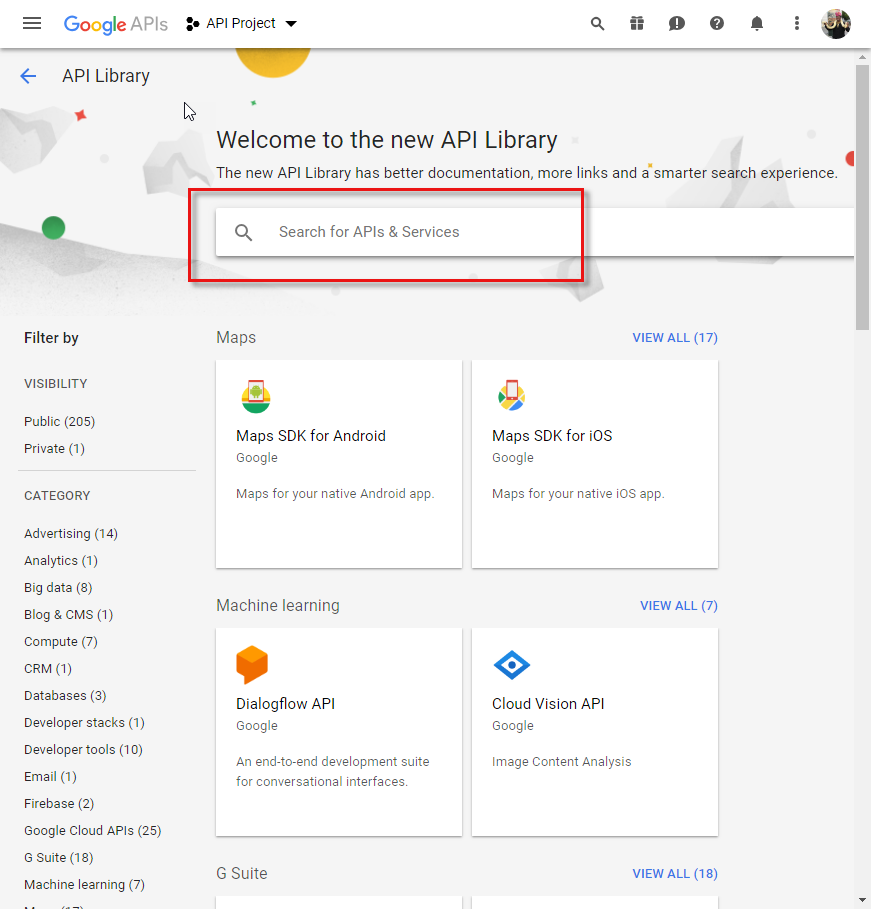
- Go to the API Manager. You will see a screen like this:
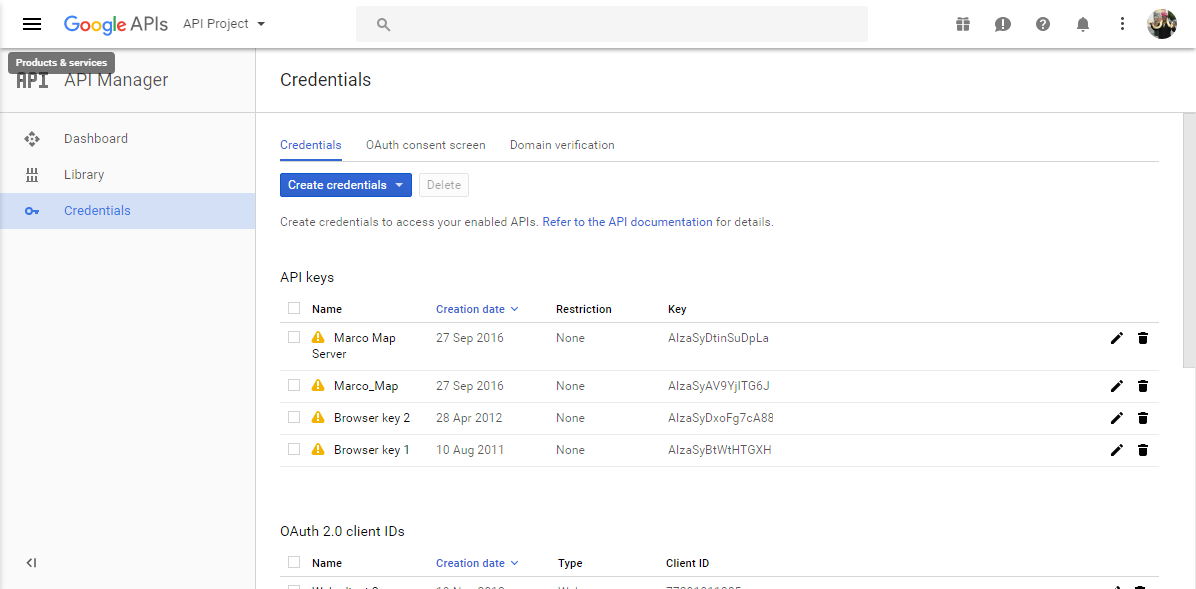
All your API Keys are displayed in the API Manager - Note that the above screen will show up if you have an API Project already. If you don’t, you can create one as per the previous section.
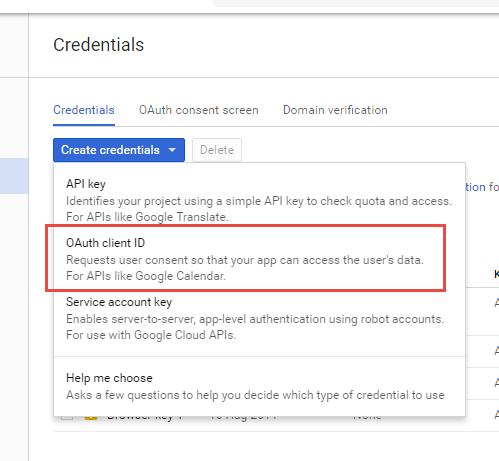
- Now you need to get your client ID. For this, click on the “Create Credentials” button, and select “OAuth client ID”:
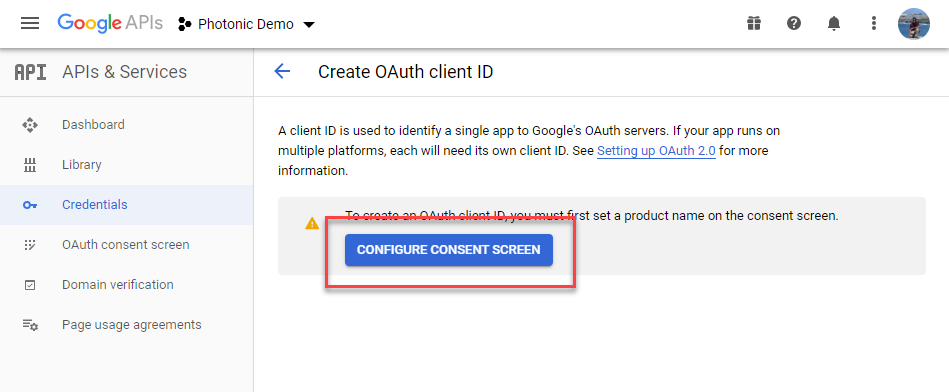
You will need to create an OAuth Client ID - If you have previously created a consent screen, the buttons below will be enabled, and you can go to step 7 below. If you haven’t, you will need to create a “Consent Screen” before you can proceed. Click on “Configure consent screen”.
A consent screen needs to be built. - Pick external, because you are going to use your GMail account for authentication.
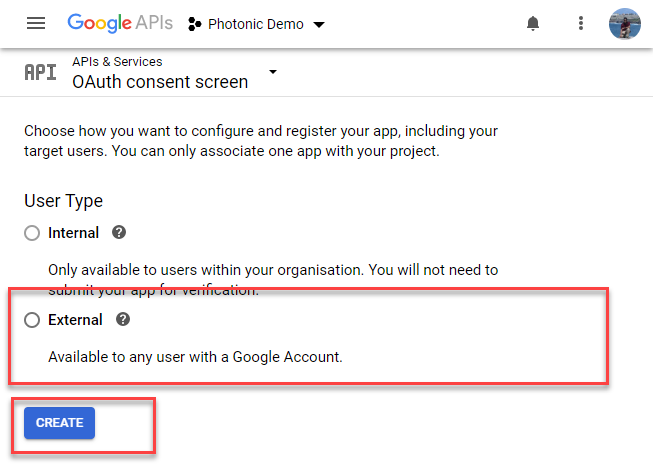
Create a consent screen for external access - On the consent screen provide the “Application Name” and provide your site’s domain name as the authorised domain (for me my authorised domain is aquoid.com; for you it will be whatever your site is), and “Save”:
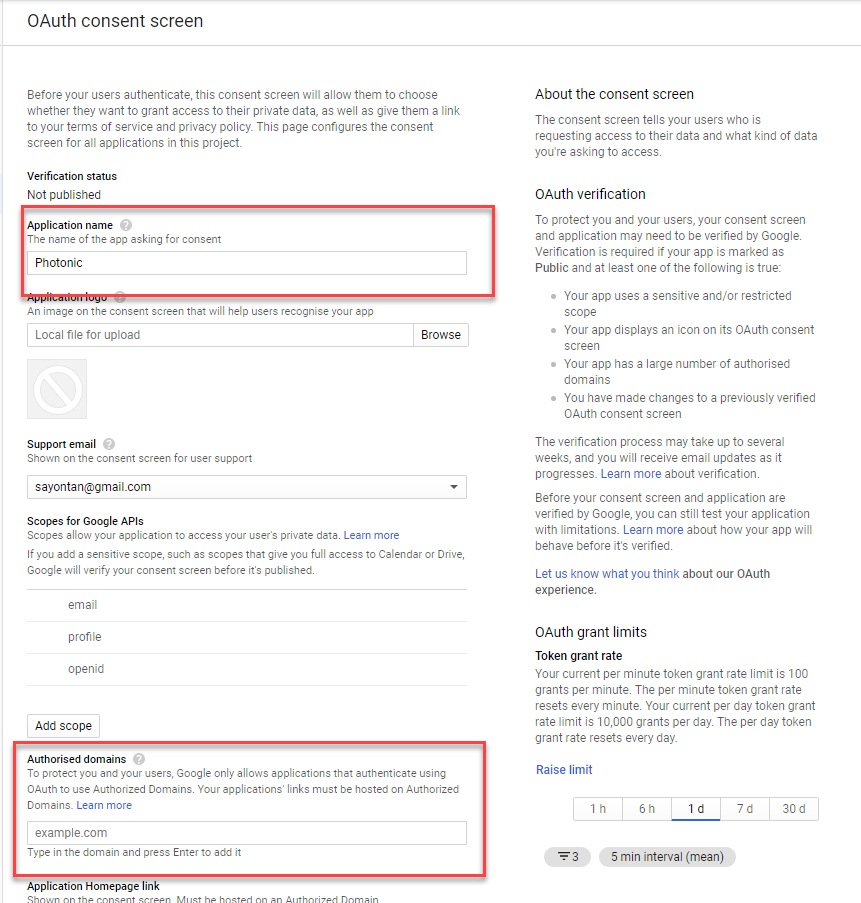
Only the application name and the authorised domains are required - Go back to Credentials → Create Credentials → OAuth client ID. In the resultant screen, you can pick one of two options:
- You can pick the option for “Desktop App”, in which case you will need to simply specify a “Name”:
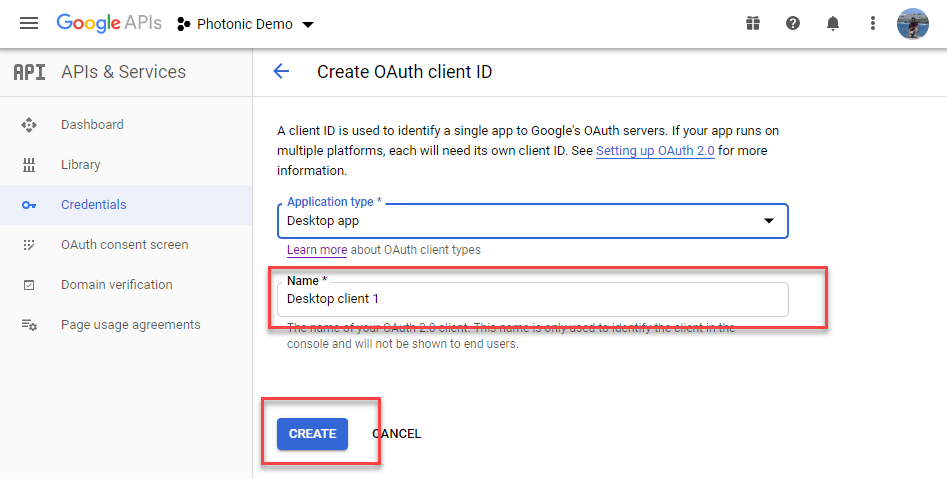
A desktop app only requires a name -
In most cases, the “Desktop App” option above will work out fine. However, if it doesn’t, read on.
If the “Desktop App” option is not working out, pick the option for “Web application”. Give it a “Name”, then fill out the “Authorised Redirect URIs”. You can get the Redirect URIs for your site from Photonic → Settings → Google Photos → Google Photos Settings → Google Client ID. You first put in one, hit enter, then put in the next and hit enter again.
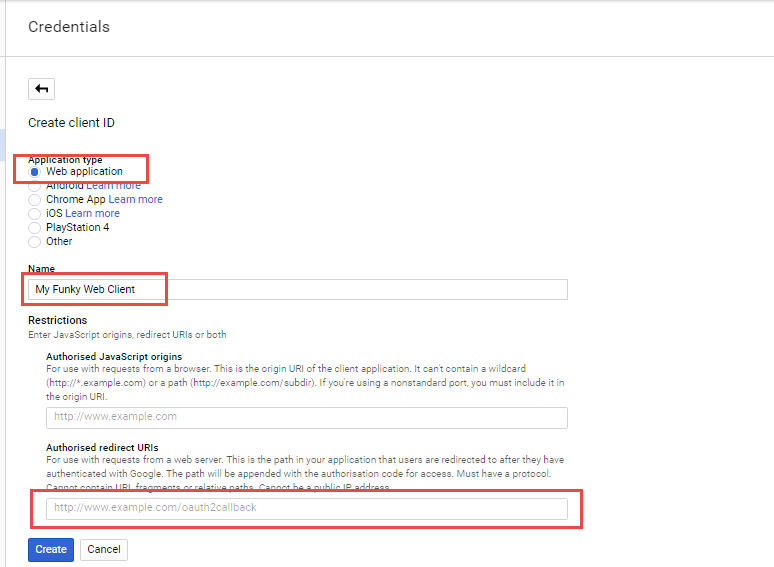
Enter the details in the highlighted sections.
- You can pick the option for “Desktop App”, in which case you will need to simply specify a “Name”:
- Once you are satisfied with your app, click “Create”. Google immediately gives you the credentials:
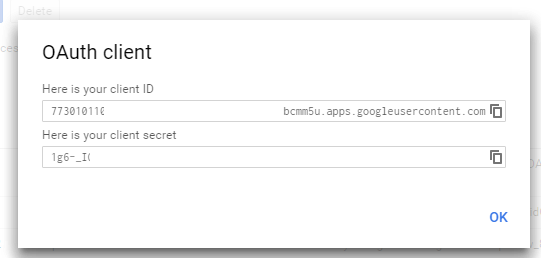
The screen shows you the Client ID and the Client Secret - Copy the information from the above to Photonic → Settings → Google Photos → Google Photos Settings → Google Client ID and Photonic → Settings → Google Photos → Google Photos Settings → Google Client Secret.
Enabling the Client ID for Google Photos (🔗)
Once you have obtained the Client ID you have to follow these steps to make sure that you are able to use it with Google Photos.
- First, make sure that the “Redirect URIs” listed under Photonic → Settings → Google Photos → Google Photos Settings → Google Client ID are present in your API Key settings in Google’s API Console. Instructions are provided above.
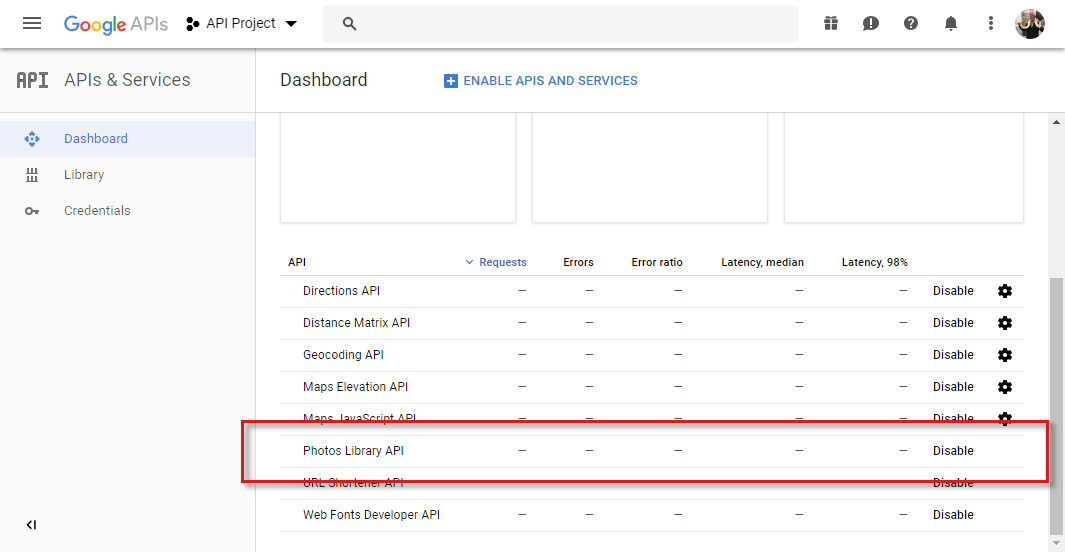
- Navigate to the Dashboard of your API Manager and select your API project. If you don’t have a project, the instructions are provided above. You should see something like this:

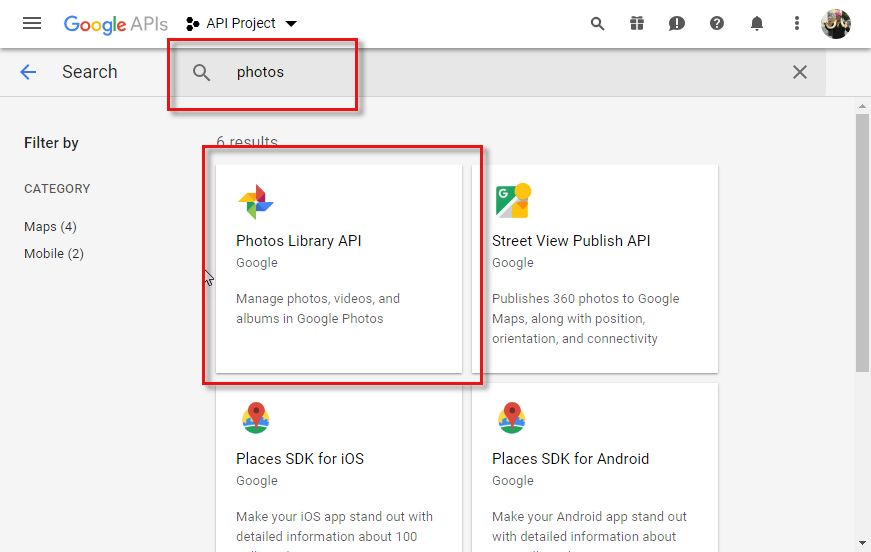
Your permitted APIs are listed on this screen - Do you see “Photos Library API” listed in the lower section above? If not, click on the link up top that says “+ ENABLE APIS AND SERVICES”. You should see something like this come up:
You can search for APIs to add to your account - In the search box above type in “photos”. The “Photos Library API” will now show up. Click on it:
You can click on the “Photos Library API” for the next steps. - You will be taken to a page with details about the API. Click on the link to enable it:
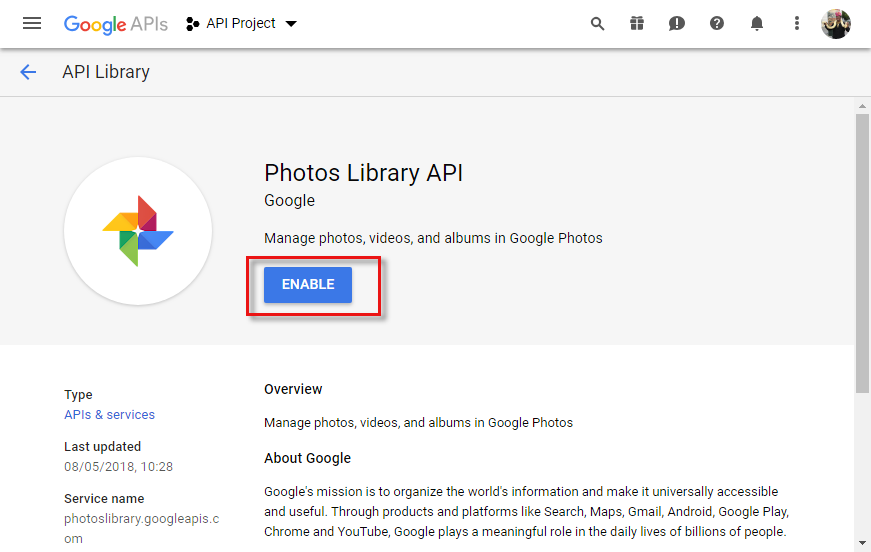
Click on the button to “ENABLE” the API - The API will be added and you will be taken to a page with statistics for it. You can go back to the “Dashboard” now:
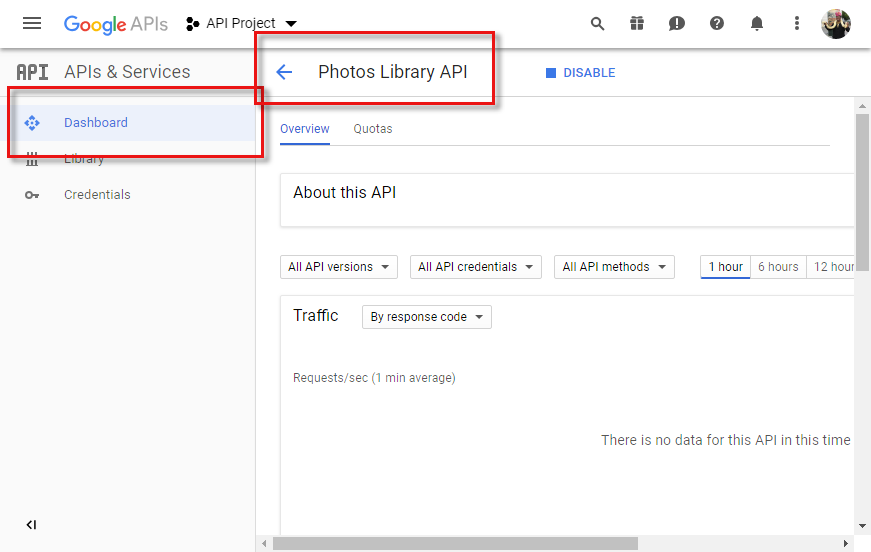
The API is added. You can go back to the dashboard. - Your dashboard will show the new API now available. Your Client ID is now configured to work with Google Photos!
All is well!
Publishing the Project (🔗)
The last step before being able to use the client ID is to publish your project. This is a simple process if you are using a Desktop Client:
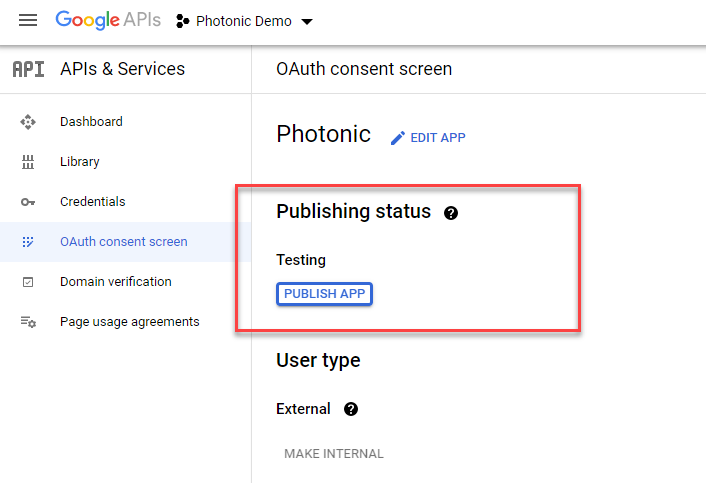
- Go to the “OAuth Consent Screen” in your Google Console, and click on the button to “Publish App”:
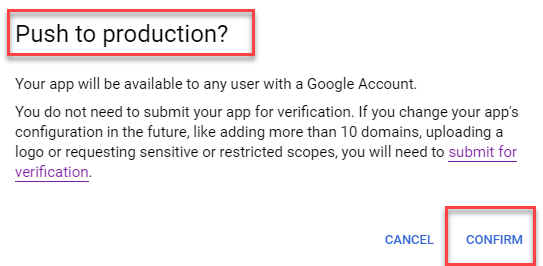
Publish your app from the Google console - You will be prompted to push your app to production, which you can confirm:
Confirm that your app is good to push - You will see that your app is now in Production. If you have just used a Desktop Client (and not a Web App Client), you will also see that there is no verification required:
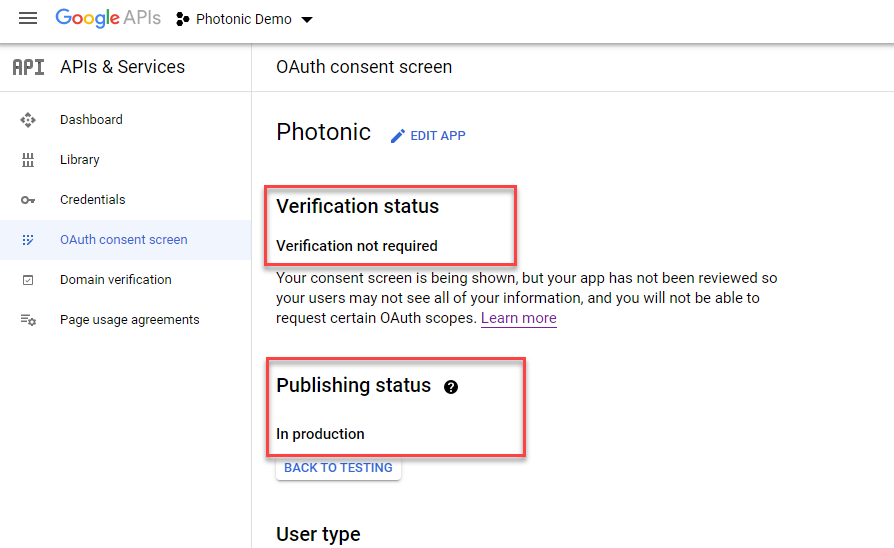
The app is ready for use!
If you have used a web client, you will not get the “Verification not required” message, and you will need the steps in the workaround to make your setup work.
If you have used a Desktop Client, all you need to do is authenticate – your app is completely set up within Google. If you have used a Web App Client, you will need to perform a few more steps within the authentication as outlined below.
Authentication (🔗)
If you thought the steps so far were cumbersome, the act of authentication might make that seem insignificant! Several users have tripped up here in spite of copious documentation from my side. Though I have made all efforts to be thorough here, if you find that some steps are missing or inaccurate, please let me know.
To set up authentication you will need to do the following:
- The first step requires you to set the Google Client ID and Google Client Secret at Photonic → Settings → Google Photos → Google Photos Settings. Use the values obtained from the above
- Next, head over to Photonic → Authentication → Google Photos, then start the authentication:
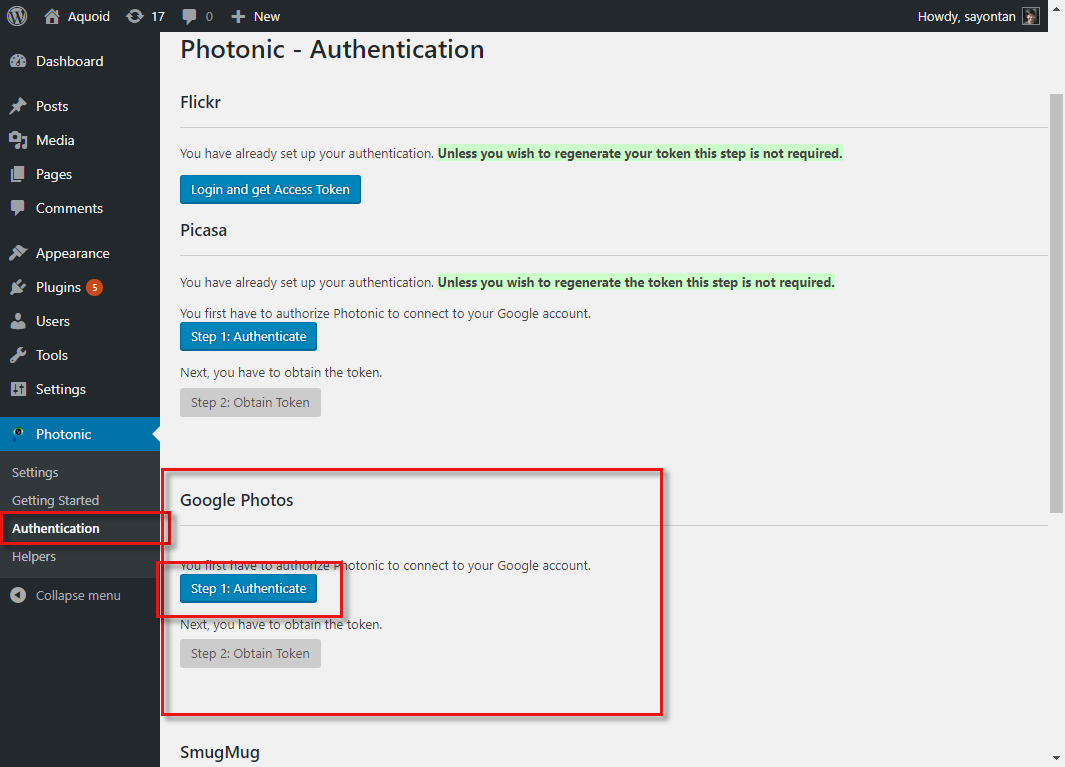
Click on “Authenticate” - You will be taken to a screen on Google that will ask you to authorize an account. Pick the account associated with your photos:
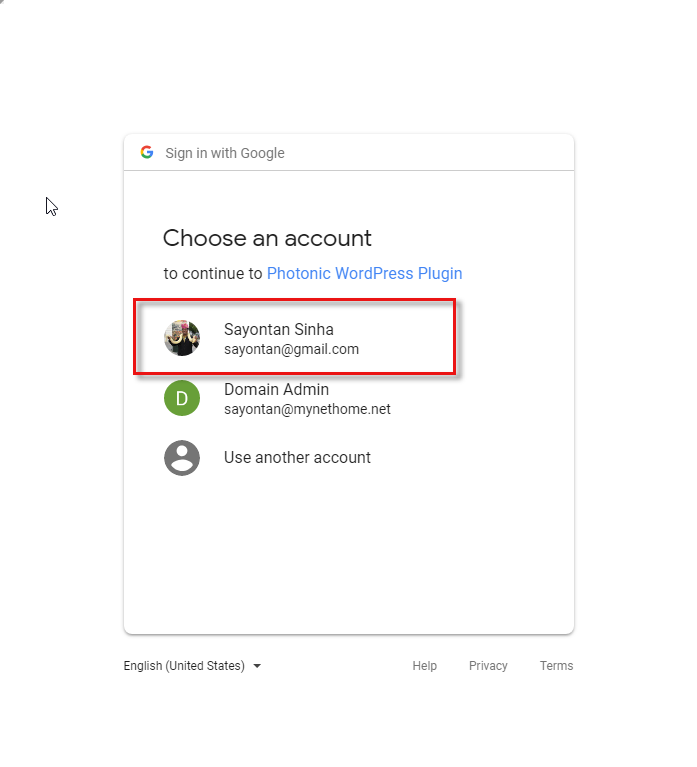
Pick the account that has your photos
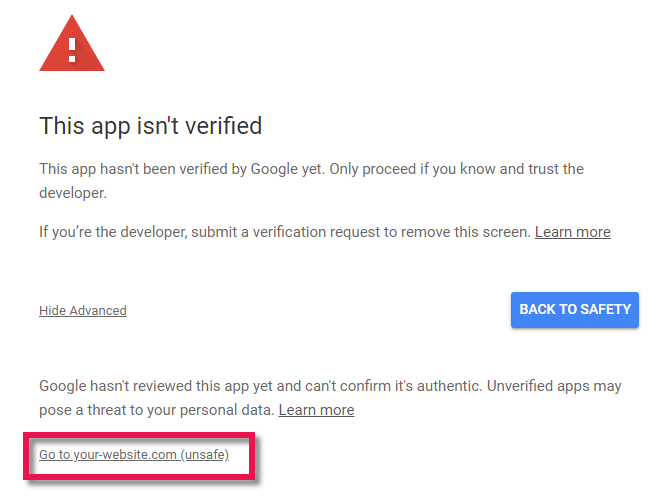
Occasionally you are shown a warning screen at this point:

Warning Screen – Click on “Advanced”
Once you click on “Advanced” you are given an option to proceed, which you can choose:
Proceed - You will be shown what permissions are requested by your API key. You can allow access to the apps:
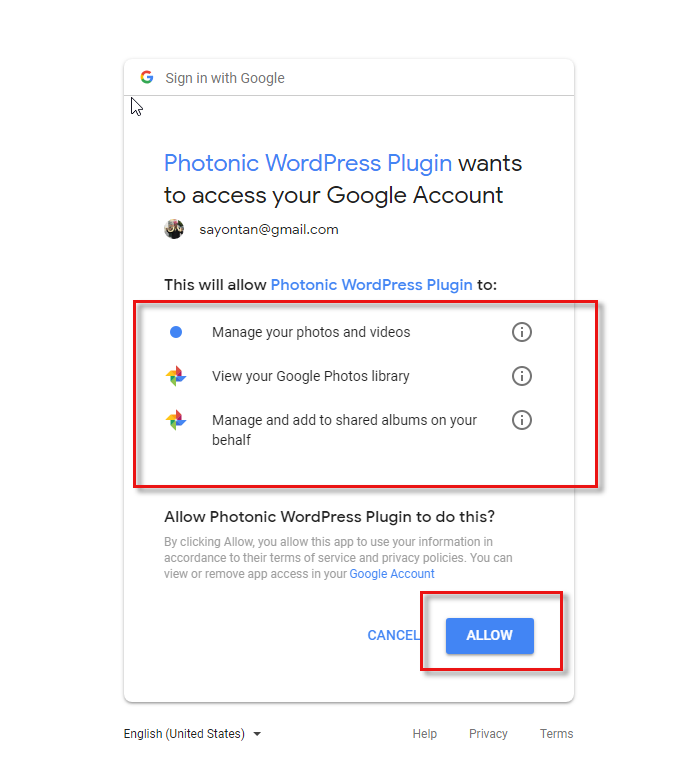
Photonic needs access to your photo library to display information. Click “Allow” to proceed. - You will be taken back to Photonic’s Authentication screen, where you can now obtain the “Refresh Token”:
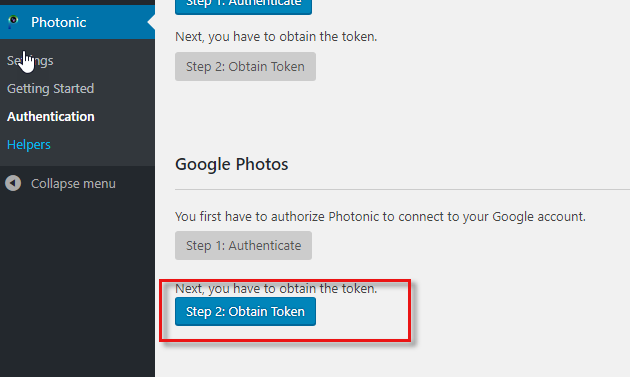
The “Authenticate” step is done, and the “Obtain Token” step is now activated. - Clicking on “Obtain Token” will show you the token, which you can now “Save”:
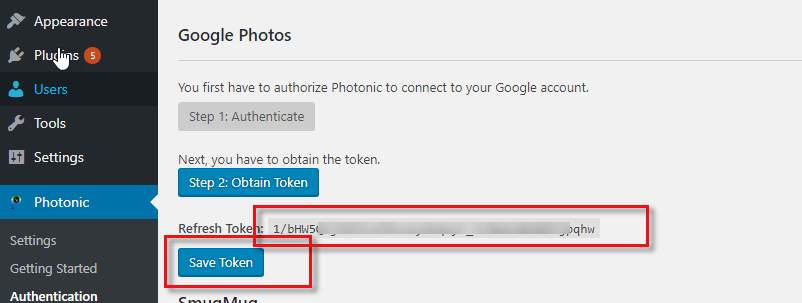
Clicking “Save Token” will take you to the Settings Page for Google, where the “Refresh Token” is set Note that the Refresh Token never expires. However, the access token that Google internally provides expires after around 30 minutes.
With that your authentication is complete. Your setup is now good for use!
Authentication Workaround (🔗)
In some cases certain other plugins can cause conflicts with Photonic’s authentication. Typically such errors are caused by security plugins:
- Error code 401:
401. That’s an error.
Error: invalid_client
The OAuth client was not found.
Request DetailsThat’s all we know.
- Error code 403, typically caused by some security plugins that disable accessing wp-admin/admin.php from external sources. Such errors show up as:
Forbidden
You don’t have permission to access /wp-admin/admin.php on this server. - Error code 412:
Your request got filtered out due to possible security issues.
One or more things in your request were suspicious (defective request header, invalid cookies, bad parameters)
If you think you did nothing wrong:
- try again with a different browser
- avoid any evil characters inside the request url
- If you are the owner of the website, you can consider revising the rules of the mod_security module or turning it off from your Web Hosting Control Panel.
- Error code 406, or Apache
mod_securityerrors, such as this:Not Acceptable!
An appropriate representation of the requested resource could not be found on this server. This error was generated by Mod_Security.
These are beyond the control of Photonic to fix, as different web-hosting configurations and security plugins have different generic controls in place and often capture false positives. To get around such conflicts there is a workaround that you can follow:
- In step 7b to create a client ID, add an additional “Authorised Redirect URI”:
https://developers.google.com/oauthplayground
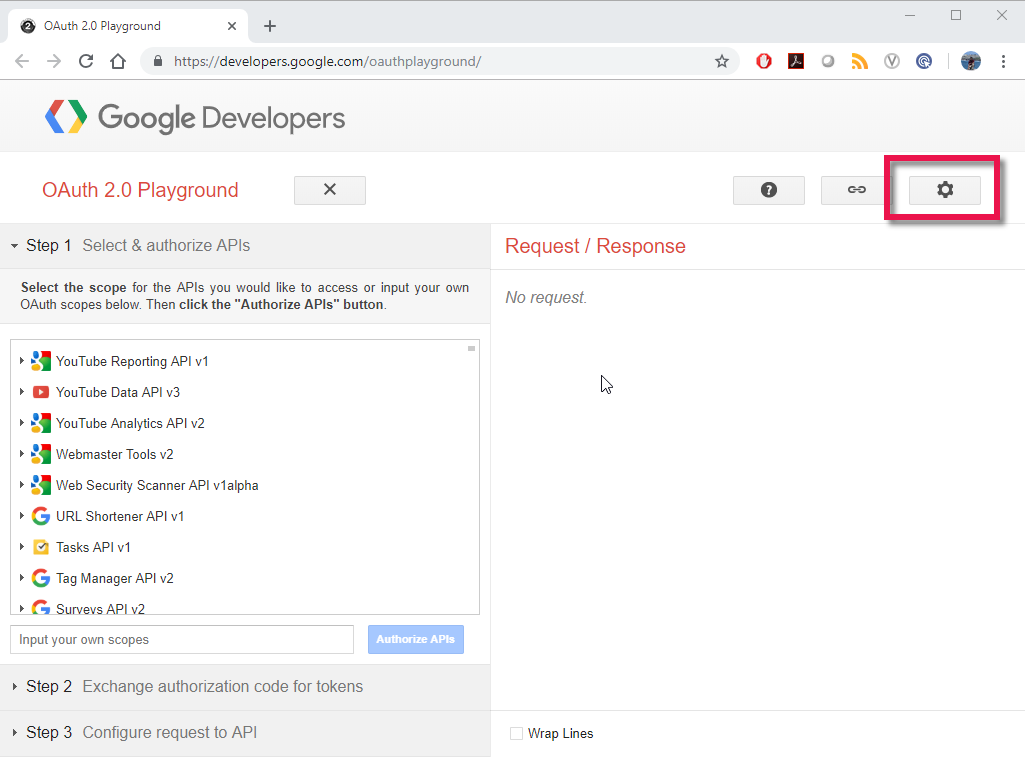
- Now go to the Google OAuth2 Playground. This is a site hosted by Google to help you do your validations. Click on the Settings icon:
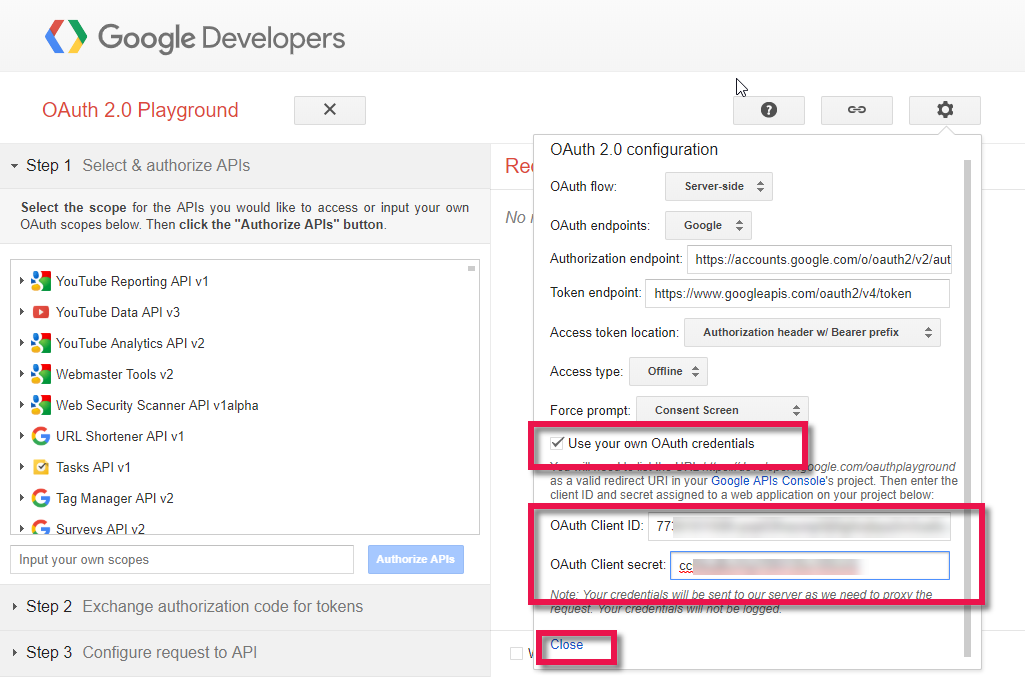
Click on the Settings icon in the OAuth Playground - Select the option to “Use your own OAuth credentials”, and provide the “OAuth Client ID” and “OAuth Client secret” that you obtained in the step to create a client ID. Click “Close” once you are done:
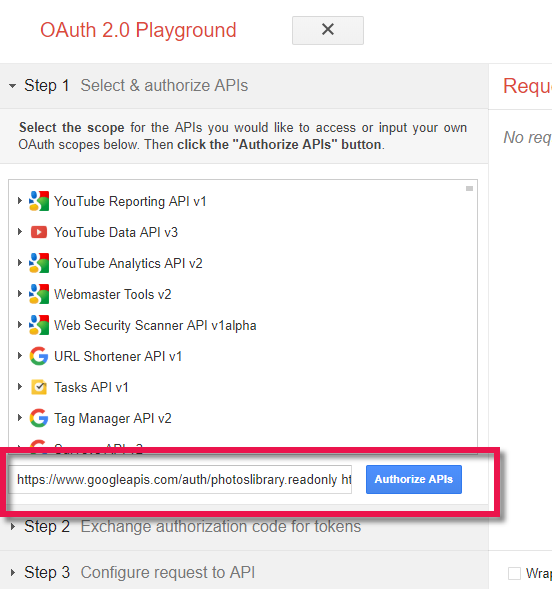
Provide your own credentials - On the left, under the section that says “Select & authorize APIs”, you will see a box that says “Input your own scopes”. Put in
https://www.googleapis.com/auth/photoslibrary.readonly https://www.googleapis.com/auth/photoslibrary.sharing. Note that there are two URLs, separated by a space. Click “Authorize APIs”.
Add scopes and authorize APIs - You will be taken to the account selection screen, as you would see in the regular step 3 of the authentication flow. You can ignore any warnings that show up (since you will be authorizing your own API key to access your own pages).
- You will then be brought back to the OAuth 2.0 Playground. You will see and authorization code and an option to “Exchange authorization code for tokens”. Click on it:

Exchange the code for tokens - You will finally see Google provide you with a “Refresh token” and an “Access token”. Copy the “Refresh token”:
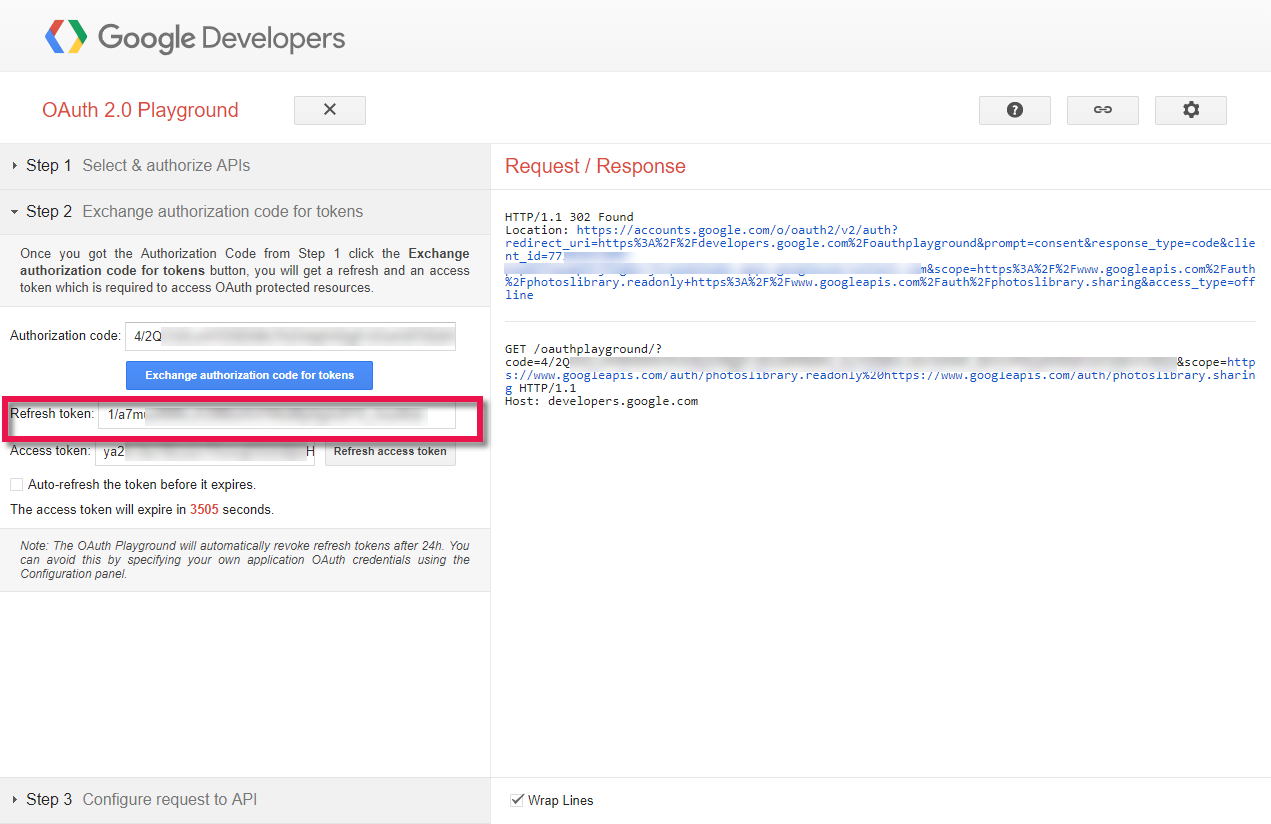
Copy your Refresh token - Go to Photonic → Settings → Google Photos → Google Photos Settings → Refresh Token (for Back-end / Server-side Authentication) and paste what you copied, then “Save”:
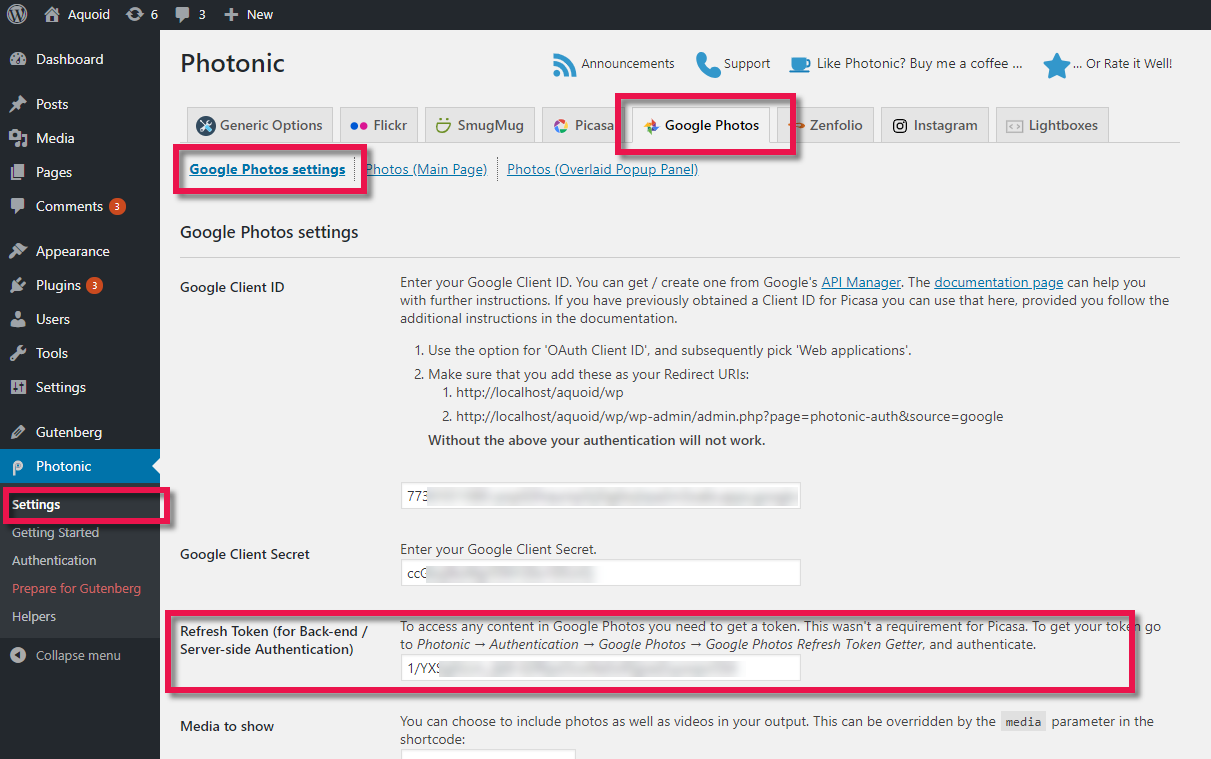
Save the Refresh Token
Other Common Issues (🔗)
Google is just too persnickety! Even after all the troubles above, you can still encounter other errors. Here are a few examples:
- Photos missing after a while
This is, by far, the issue that people encounter most. The root cause of this is caching. In the last point under Authentication, I had mentioned that the Access Tokens expire after every 30 minutes. This means that the markup generated for your page is also going to expire after 30 minutes. This behaviour is fundamentally at odds with caching, where the markup gets saved in perpetuity. There are two ways to resolve this:- Exclude this page from caching – Since Google will invalidate your gallery’s markup after 30 minutes anyway, caching it will result in errors. So, exclusion is an easy option.
- Use the JavaScript Load Mode – The JavaScript load mode was introduced to defer your gallery’s rendering to the front-end instead of the server. Typically, if your shortcode is getting gallery while your page is being read, it causes the server to wait until the whole page is generated. This causes your site to slow down. In the JS load mode, however, the gallery is generated after the page is displayed via a JavaScript call. Apart from your server responding faster, this also means that the gallery markup is not going to get cached. This is a pretty smart way to get around Google’s limitation!
- Violation of Acceptable Use Policy 1
A few users have reported this issue. Unfortunately, apart from appealing with Google, you cannot do anything here. Google’s AUP 1 states that you should not try to mimic Google Photos in an app. My guess is that if you have a high volume website that repeatedly hits the API, and you sometimes exceed your quota, it likely triggers this violation.