Passing certain parameters to Photonic with the gallery short-code you can make unauthenticated API calls on SmugMug to display the following:
You can also control various skinning aspects of how the thumbnails are displayed.
The gallery short-code has to be invoked with type='smugmug' to invoke the SmugMug functionality. Click on the links above to see examples. Note that you need to obtain an API key from SmugMug for this. The API Key has to be entered in Settings → Photonic → SmugMug → SmugMug Settings.
Steps to Make SmugMug Work (🔗)
The following high-level steps are required to get SmugMug working on your site:
- Obtain an API Key if you want to display your private photos / albums
Historically Photonic has required an API key for SmugMug. However, starting with version 2.19 of Photonic a change is in effect:- If you are displaying regular SmugMug photos, albums and folders (i.e. you have no private photos to display) you don’t need do do anything specific. You don’t need an API key, and the plugin will work straight out of the box!
- But if you want to display private photos or albums or folders, you will need to set up authentication, and for that you will have to obtain an API key. This is an easy process, and you can read below for the steps to do this.
- Start creating your galleries
Obtaining an API Key (🔗)
As written above, a SmugMug API key is required for showing content from SmugMug. Obtaining the key is a straightforward process:
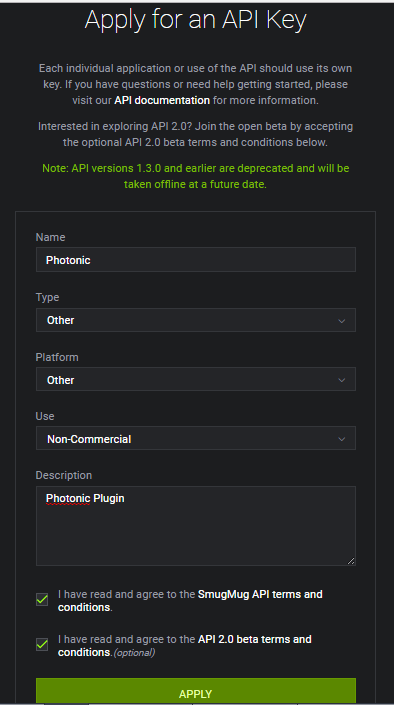
- Login to your SmugMug Account. Then go to the page to “Apply for an API Key“. Fill out the requisite details:
Put in the details as appropriate - Once you click on “Apply” in the above, you will be shown the details for your API key:
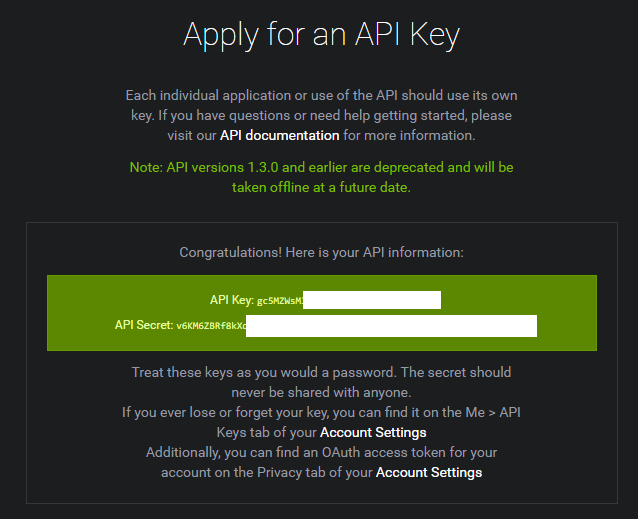
Note your API Key Details - You can save the above in Photonic → Settings → SmugMug → SmugMug Settings → SmugMug API Key and Photonic → Settings → SmugMug → SmugMug Settings → SmugMug API Secret.
Now you should be done!